
by Matthew Russell - Posted 6 years ago
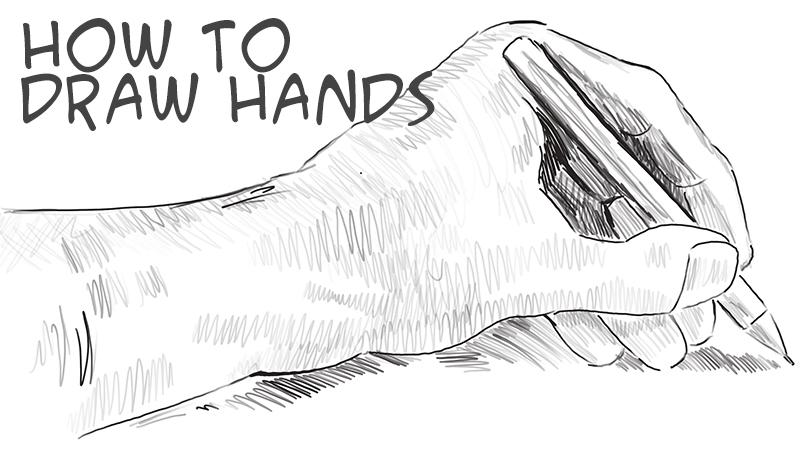
Welcome back Vigilantes. It's time to once again pick up your pencil and create a masterpiece. We are again, diving into the wonderful world of tutorials to teach you how to draw hands.

Don’t worry, Every artist at one point or another has an issue with drawing hands, even professionals. I could go through some of the top comics today and showcase a collection of poorly drawn digits that would have you scratching your head (hopefully not with these drawn out fingers).
Anyway, we are here today to help you with this. Before we begin, we will need a few things. Grab a couple of pencils and paper. I recommend a blue color pencil (for designs and outlining) and a great 2B pencil for our final drawing.
I am using my iPad Pro with Apple Pencil and the app ProCreate. I love this combo but there is something about the feel of the paper and pencil that I miss. I use the iPad because it helps with writing the tutorial.
It may help to have a hand available. If you can’t get a model to stay still for a lengthy amount of time, go ahead and take a picture of your own. You will be able to see all the little nuances, wrinkles, muscles, bumps, and bruises. The more imperfect, the better.
This one might be tough. Please don’t cut your model open. Someone is going to say “M. Scott Russell told me too!” and the next thing you know I will get sued. NO! DON’T CUT ANYONE!!!
For a safer look inside the hand check out some anatomy books. People like Leonardo Di Vinci already did the hard part and dissected people to figure out how the human body works. I have the book “Surgical Anatomy of the Hand” by Schmidt, Ulrich Lanz (M.D.) that I found at the thrift store.
Check out the bones. You can see where they bend. The muscles overlay this jungle of bones, It’s truly impressive how they all work together.

As you study, look carefully for the tendons. Each finger has at least one. Keep them in mind as you draw. This is important if you want a realistic picture.
The veins are pretty cool. To make a hand look stronger, accentuate these! They float along the back of the hand with the tendons and are kept safe by the bones. Where the tendons are straight, these curve like a lazy river.

On the palm side we have the fat pads. I don’t care how hard you work out, you still have these. On each finger you have 3, separated by the knuckles. A major fat pad rests on the thumb going into the center of the palm. These are very malleable and can be exaggerated to showcase an action of the hand.
Now that we have seen the inside of the hand play around with your hand. Pay close attention to where and how each digit moves (either separately, or together as a group). Look at how the light bounces off you skin.
Make some fantastic movements like Dr. Strange and check out how your tendons and veins react. What are the wrinkles doing? The hair?

Now that everyone watching you observe your hand like a mental patient is through laughing, let's hit the drawing board and show them up.
It helps to think of the hand as separate entities; we have the wrist, the palm, fingers, and thumb jetting out on its own. For this exercise I am drawing my own left hand with the palm up. This means that my thumb will be on the outside on the left.

Start with the palm. Draw a square. Remember to use your sketching pencil. Draw another box the exact same on the top. This will represent your fingers. For simplicity sake the box for the palm is now called box “A” and the one for the fingers is box “B”.
Underneath the first box draw a small funnel. Remember to not make it too narrow or your hand will look weak. If you don’t add the funnel and draw lines straight down it could look either fat or far to muscular.
On the left side continue out the line from the funnel. Where it meets the corner of the box should be the halfway point.This gives you the base of the thumb.
Draw another line about twice as long in a less obtuse angle. This gives you the outside of the thumb.

Let's start from the wrist. It doesn’t matter if you're the world’s biggest geek or Arnold “freakin” Schwarzenegger, your wrist is a cylinder shape. Looking at the wrist straight on, give it a slight curve for the top.
At the top of box “A”, give this a little slanted roof. Slight slant. Don’t go overboard. This is where the base of the fingers lay.
Over draw these lines. Since you are using your sketch pencil, it doesn’t matter how far out the lines go.
On the very top of box “B” do the same but make this roof a little steeper than the last. This represents the tops of the fingers.
If you notice the tops of your fingers, they are never the same length. The middle finger extends far beyond the others. In order to give our drawing a more natural look, I chose to spread the fingers. By doing this you can give the other fingers slightly exaggerated lengths without anyone noticing.
As for the thumb, this is where you need to decide your finger width. If the thumb is too fat or too skinny, your picture won’t look right. Keep all your fingers and thumb close to the same width.
Coming off Box “A” about half way up draw a spoon shape. This gives you the pad on your thumb as well as the divot before you thumb connects to your hand. Keep it small. You don’t want to make the pad too big.

Back to the wrist area. Change the top of the cylinder to represent more of the fat pad for your wrist. 2 quick stroke will do it.
It might help to give the wrist a slight angle outward. Keep the angle outward small. Don’t over exaggerate this one or it will look goofy. This will give the illusion of muscle underneath. For some of us, it is just an illusion.
Now the thumb. Show where the crease from the knuckle is. Round out the outsides so your thumb doesn’t look like a robot (unless that is what your going for).
Draw a slight line going upwards where the spoon met block “A”. This will start to give your thumb some form.
All palm readers know that the palm has a couple of wrinkles. The bottom one and most pronounced is the “life line”. This should go from almost the center of your bottom palm lines, curves around to the outside on the felt and touches the outside of the hand above where the thumb connects.
The next line is the “head line”. Apparently this has something to do with mental pursuits, not IQ. Mine touches the life line and stops under the edge of my ring finger. Since we haven’t added the fingers yet, stop the line about ¾ across the palm.
The heart line is the top one. Located above the head line, the highest horizontal line on the palm is the heart line. Also known as the love line. We will be approaching this from an artistic approach, and not some strange voodoo magic that I put zero stock in.
Look, the only reason I talked about the “palm reading” is because that is what they are associated with, nothing more. If your into that, good for you. I am not, so don’t ask. I only know what they are called from watching movies.
Back to drawing. The love line is created by the fat pad that covers the bottom most knuckles of your hand. This allows you to better grip things like tools. From the right outermost point, it begins and goes ? of the way across the hand at a slight angle upwards.
Now onto the roofs. Divide the top of the box into 4 equal sections. Each one forms a finger jetting out. They should be roughly the same size as the thumb.
From each tally mark that you have made dividing the roof we will make a “V” (the 2 on the outsides will only make 1 line coming out). This will give us the fingers.
Draw 2 semi-circles to indicate where the knuckles are. They should be a gradual progression from the first roof to the next. Give each intersecting line a smaller dash like line. This will showcase the creases between the fat pads on the fingers.
Now that you have everything ready to go, trace your hand with an actual pencil (2B or darker). This will give you the actual hand. Now all you need to do is add the smaller imperfections, shading, and life to the drawing.
If you were using a blue color pencil, take it into PhotoShop scan it in and check back with us on how to remove the blue sketch lines. It’s easy.
If you are just dying to jump right into drawing more, I have some great things for you. Antarctic Press has put out several “How To” books. I love them. I’ve got them all and have gone through them step-by-step, trying to pick out what I like to add it to my own skills. Check them out while you practice, it will do some good.
I hope you check back next Monday when we add a side view of the hand. Soon you will be ready to draw anything from any angle. Always remember, keep practicing. When you think you finally have it down, re-draw it about a thousand times. This will convert it to muscle memory.
Also, watch out for the Photoshop Tutorial on removing blue lines coming soon. Hope to see you soon. Until then, good drawing.

