
by Matthew Russell - Posted 6 years ago
I come in peace, my fellow Vigilantes. I wanted to reach out to you today to talk about something very important. We are going to remove the blue sketch lines from our comic in Adobe Photoshop. Typically, I am a writer but I dabble in the occasional art project, mostly covers.
You see, I consider myself an artist, but I am nowhere near fast enough to do the interior artwork of a book. Normally it will take me a full week to do a picture. Keep in mind that on average there can be up to 6 panels on a page. In order to complete a page, I could easily spend a month and a half.
This means that I could spend years on a single book. Now since I am not drawing Kevin Smith’s Daredevil/Bullseye: The Target, you could probably see this as a problem.

Wow, a little off topic there. Sorry for the rant.
Anywho, when I am working on a cover I follow some basic steps. These steps would be the same as if you were working on the interior art, page by page.
Just FYI, this tutorial is intended for those that are taking the traditional approach of paper and pencil on Comic Tablet such as this Comic Art Board from Amazon. It is my personal recommendation due to paper quality and how well it holds the ink without scratching or bleeding.
Now back to our regularly scheduled tutorial. This is assuming that I am not working with another artist and that I am doing everything solo-style. I like to handle everything from the script all the way to the lettering.
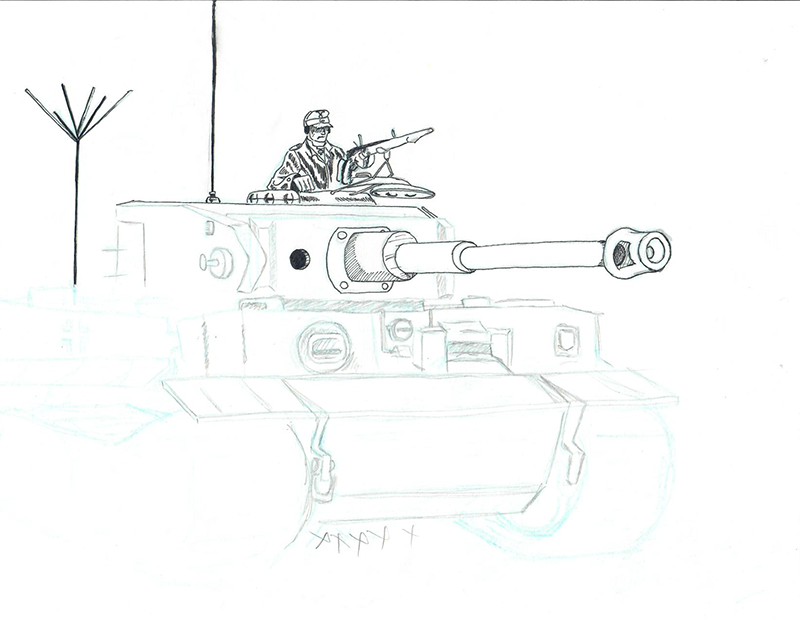
For this tutorial, I am working on a piece for the local First Robotics Club (Ammoknights group 1566) who had their state competition ripped from them due to the Coronavirus. They worked so hard and I wanted to do something for them. Their mascot is a knight driving a remote controlled tank. I wanted to do a much more detailed and realistic picture/poster for them. I will be starting with the tank for this tutorial.
Before we really begin, this tutorial requires that you have at least a basic understanding of Adobe Photoshop. Instead of using the most current version of Photoshop CC, I am using Photoshop CS6. I do this because this was the last version that you didn’t have to buy a monthly subscription to use it.
The process is the same with Photoshop CC as with CS6. To get a better understanding of it, I recommend that you watch the video underneath. If you already know your way around the program, skip the video and move straight onto the drawing section.
After the script is done, and before you put any pen to paper, come up with thumbnail sketches. These are some quick sketches that you will use to give you a rough idea of what you want. Use the script to come up with these sketches.
On occasion, I have turned in thumbnails based on my script to the artist. Until the artist and I have a smooth working relationship, the thumbnails help sand out the rough spots. When I am working solo, this helps remind me what I was intending through the writing process.
There may also be times when the artist is reading my script and throws their hands up saying “What the hell are you trying to say here!?!” Once again, thumbnails help.
This stage is done with a blue color pencil that I got at “Hobby Lobby” for just under $4.00.
When coming up with your masterpiece of a comic, it is best to sketch out your pencils and thumbnails with a light blue. Try to match the color of the guidelines on paper. This will make it easier to remove them in Photoshop later.
The blue lines that are already there are known as “guidelines” I will have another tutorial about that on a later date. Most likely next week while it is fresh in my head.
The blue lines that you are going to put down are your thumbnails and eventually sketches. These can easily be removed after we get out pencils and then inks on the paper.
When drawing in a ProCreate, it is so much easier to remove such blue lines. While drawing your thumbnail, do this on the main layer. When you are ready to add in your sketches, do this on another layer and turn the opacity of your thumbnails WAY down. Turn them down until you can barely see them.
Now, due to the advancements in technology, you can skip your sketching stage and pencils and begin drawing right with your inks. you can manipulate every line how you see fit. If you mess up, double tap with 2 fingers to undo or erase without smoothing out your paper or worrying about the pesky fall-off crap with the eraser residue.
When you are done, simply turn off the thumbnail layer. Easy peasy.
After you have finished your sketch layer in blue, go ahead and go over it with pencil. Your blue pencil will not affect the new layer. My personal favorite is the Staedtler Mars Technico Lead Holder. I love mine and have had it for years. I’ve tried other “regular” mechanical pencils and the consistency of the pencils are just off. When you start using them on a regular basis, you will start to see a difference.
Now that you are happy with your page (yes, complete the entire page) begin using ink. For larger darker sections, I recommend using a brush and indian ink.
Just be careful when you get to the edges so you don’t run into some major bleeding. It could ruin your page and once it's ruined, it is very hard to fix it (although it is possible). That might be another blog post idea.

Most higher end scanners will scan at up to 600 dpi (dots per inch). At this point, the higher the better. One of my buddies has a scanner that is set to scan at 4800 dpi. I love that.
The problem is that most scanners are 8.5 by 11.7 inches and your artboard is usually around 11 by 17 inches. This means that you have to scan it in pieces and put them together in Photoshop to make a full piece.
If you have to do this, make sure that your scans are straight. It is a pain in the butt to try to rotate half of your image to get it set correctly.
In order to solve this, years ago I spent a pretty penny on a scanner wand that is 11.5 inches wide. I also created a jig that allows my scan to never get wobbly. Problem is that it no longer works with my current computer setup. It stopped working when I updated to Windows 10 and now I’m all set up on a Mac.
For this reason, I create everything on Procreate, or I will take it to OfficeMax to be scanned. My buddy is never home so I can’t use his scanner.
When everything is scanned and put together in Photoshop, there is a very quick and easy way to remove the blue lines. That's why you're here after all. All this build up and this is the easiest part.
Photoshop uses channels to store color information about your page. As you open your image, it will automatically create these. You will have 4 options; RGB, Red, Green, and Blue.


RGB is all the colors together. Since this is a single image on a screen, it will use RGB instead of CMYK. For more information about this you can check out an earlier blog post titled Size, dimensions, colors, and styles. What does it all mean? Part 1 where we go into details about the differences between the color modes.
The channel Red covers all the reds in your artwork and so on. There is a check box for the blue. Click it. All the blue goes away.

Now, just because the blues are visually gone, doesn’t mean that they are really gone. Just like that picture of you in drag for Halloween due to a bet that you lost and your friends swore they deleted it, it will come back to haunt you. Yep, that was oddly specific, but a bet is a bet.
To keep it gone, switch from channels back to layers and flatten the entire image. Make sure on the layers panel you unlock it for the next step. Do this by double clicking the lock icon next to your only layer.

We aren’t done yet. There are still some scan lines that are light and funky. Can you see the light grey blotches? This happens with almost every single scanner that I have ever used.
To get rid of this use the Magic Wand Selection tool. Have the tolerance set for about 50 and click in the middle of the scan lines. Make a selection and make sure that it isn’t selecting any of your actual artwork. When you have everything selected, hit delete.
Presto, All you are left with is your artwork. You will probably have a grey checkered background. Not to worry there is a solution. Create another white layer and then move the layer underneath your current layer with your drawing. At this point, you're ready to go.

Once you have all your artwork completed, start putting your comic together. Professionally, you would have to do this at a pace of 1 page per day as I said at the beginning. Don’t stress about it, do what you can. We all know that you need to have your job to be able to draw comics.
While you are creating, go ahead and check out some of the other comics that your friends have already created. Check them all out on the marketplace.
Also, check out the new “Comic Bucks” program as a way to make a little extra cash from your creations and friends.

