
by Matthew Russell - Posted 5 years ago
Welcome, my CryptoComic Compatriots! We started this journey down the fundamentals of comic book art only recently but we are almost done. Can you believe that we are on part 7 of 9 already? We started this path after interviewing the legendary Dan Cote and he was saying that we always need to get back to the fundamentals.
Just like training to be a better basketball player, we have to get back to the basics, and here they are. If you remember, we started by explaining what they are with an overview with Fundamentals of Comic Book Book Art Part 1: What Are They.
Next we explained how every dynamic drawing can be broken into simple shapes in Fundamentals of Comic Book Book Art Part 2: Construction. This was probably the most important fundamental due to the fact that we tend to use this in every single drawing that we do, especially this one.
After tackling the construction step, we jumped over to Perspective in Fundamentals of Comic Book Book Art Part 3: Perspective. It was here that we started talking about everything from Vanishing Points, 2 and 3 point perspective, and how to create some pretty cool backgrounds landscapes.
The Fundamentals of Comic Book Book Art Part 4: Anatomy also plays pretty heavily into this current fundamental lesson. If you want to know all about how to handle gestures and make it natural, you should have at least a pretty basic understanding of how everything fits together anatomically. It only makes sense.
In order to give you a bit of a break from drawing humans (we don’t want to get you burnt out on drawing people right away), we jump back into drawing basic shapes. This time, we add shading and color with Fundamentals of Comic Book Book Art Part 5: Color Theory & Light. This is the one that I struggle the most with, personally. There are some pretty good tips, that I have to keep reminding myself about all the time.
Last but not least, we head over to the world of composition in order to give each drawing a unique look and feel. We want the eye to follow certain patterns and force it to look at new and dynamic focal points. How do we do this? Well, read the Fundamentals of Comic Book Book Art Part 6: Composition for the answer.
Now that we are all caught up, let’s move on to gesture drawings. Special note: All sketches of people are sketched from either Sketch Daily, or Quick Sketch which I will explain later in this post.
When you are first sketching out your comic or thumbnailing it, a gesture drawing is one of the most important parts. In order to draw any good gesture we need to ask ourselves some things, for example...
- How are the legs collected?
- Where are all the joints?
- How do the muscles connect to the body?
- How close is it compared to the rest of the drawing?
- Where do we start?
One of the things that drives me up the wall with an artist is stiff looking poses. You could have a great story but when a person starts looking robotic in their movements, it shows. Getting good with gesture drawings will set apart the novice from the professional.
Getting good at gesture drawings in comics will make it so you can easily make a quick sketch and layout for a good panel. You will be able to bang out a page pretty quickly. Since this drawing is pretty minimal, we don’t have to focus on the little details here.
I start out with about 10 different poses and I will set a timer for about 30 seconds. They don’t have to look good. They are taking 30 seconds after all. I just want to get something down on paper that somewhat resembles a person.

I will follow that up with 4 sketches that should take 2 minutes each. This will allow me to add more detail and allow me time to focus on things like clothing and hair. It’s still pretty quick but these are a little more fun. Less pressure than the 30-second sketch.

I will then follow it up with a single 10-minute sketch. This allows you to really get into shadows, hands, and feet, clothing (wrinkles specifically), and facial expressions. The one thing that you still need to remember is to not over-think this stage. Have fun with it. Stop when the timer goes off. Eventually, you will be able to get a full-fledged image out of this….not something that you would publish as a completed art piece, but something that you would consider a base. A good starting point.

I personally use this as a daily warm-up. I will sit down with my iPad and shake my entire arm for about 5-10 seconds and then start drawing. Each drawing will take just a short amount of time (as previously mentioned), so a few quick drawings between sips of coffee is a great way to start your day. Warming up makes me consider everything from an artist’s perspective.

Waking up in the morning, I still haven’t swept away the cobwebs from sleep. Just like stretching for a runner, I love to stretch out my artistic abilities each morning. I might have to start doing this even on the weekends when I am not drawing. I love the way that this actually relaxes me and clears my head by only focusing on the piece.
As we have mentioned in all the previous “Fundamentals” posts; practice makes perfect. I think I should add “Perfect practice makes perfect.” If we don’t try to get better and really look at what we are drawing, we will never improve.
As I have said, this is a great warm-up. I do this even when I am just going to be writing. This helps me think about everything and allows me to thumbnail a picture more realistically. The last thing I want to do is create a situation where an unnatural pose is required. If I was going to write a Spider-Man comic, I still don’t want Peter Parker folded in half in order to dodge a bullet.
This is the “who cares” stage of a good drawing. I won’t even use the eraser tool. If I have an arm completely out of place, I redraw it on top of my drawing. It’s not that big of a deal. Mistakes are all part of life. Accept them and learn from them. Have fun without overthinking them.

As you learn from your mistakes and begin to get extremely quick, you will become a “natural” with your drawings. Eventually, everything will become instinctive and you will start to form your own personal style. Have fun and get creative. Not to sound too zen-like, but let the art flow through you...become one with your drawing. Too cheesy?
As I have said a million times, Anatomy is key to this stage. The great part is that this is an awesome way to actually learn anatomy. By looking at your subject and sketching it out, eventually, you will learn how each piece is connected. Focus on the joints if that is what you struggle with.
I still struggle with knees and elbows, so I pay more attention to them when I am sketching. Eventually, I will master that and I won’t have to look at a subject to be able to draw these joints. Eventually, I will convert them to memory. The more you draw, the more you will learn.
Besides drawing them every morning, what more do you want? Ok, I have some pretty great tips for you in order to improve your gesture drawings.
Give your gesture drawing a head, even if it is just an oval. This will give you a great starting point that everything else can be built off of. If you remember, the body is 8-head heights tall. Once you have that, everything builds from there.

The head will guide the rest of your pose. Is the head looking up, down,off to the side? Is the head closer to you, further back? This will play into the center of gravity.
Don’t try to get every detail right off the bat. Go with the essence first. This means that you try to get a base first, detail later. If you take a look at both images below (I drew 1 and then added more to it later), the first one barely has any detail. I capture the essence first and then work up from there. Get good at just looking at the most basic and add detail later.

I have heard instructors say to never bend your wrist. Draw with your elbows. Turns out that this is true, even with an iPad. The curves should feel natural and not forced. Your pencil should have a large swinging motion in order to make everything flow together. There are no straight lines in nature so stop adding them to your sketches.

As I stated before, a stiff image will throw off the flow of the story. It might not matter how good the writer is, if the character looks robotic, boom, no longer a great comic. It is unfortunate that so many epic stories have fallen under the weight of the art.
Make sure that each pose isn’t so stiff that your character no longer looks human. Loosen up your grip on your pencil and let it fly. Get your shoulder and elbow moving and larger curves. Your character isn’t a marble statue, it is a living breathing malleable human being. Draw it as such.
Look at your pose and ask yourself how the center of gravity works with this pose. If the pose is not balanced, then the subject would have fallen down and looked off. There are some exceptions to this, though. Is your subject supposed to be falling? Have they been hit?

The weight of the body should easily be balanced on 1 leg or evenly distributed between both legs.
Start by trying the pose yourself and ask yourself, does it feel wrong? If yes then the drawing is wrong. Is this something that works, can you get into that pose?
If you are having problems with “drawing a person” with your gesture poses, start drawing some simple still life images. A vase is much less complex than a toga-wearing human. Force yourself into looking at things like simple shapes and then build up from there. When you feel you have mastered this, then people will be a snap. You might remember this image from the Construction post.

When the Americans first went to space, we noticed something interesting; our pens don’t work. It turns out that pens need gravity to work. We spent millions of dollars on creating a pen that would work in outer space. The Russians ran into the same problem and their solution was simple, bring a pencil.
The smarter we get, the more we tend to overthink things. That is why it is so important to get back down to the essence of things and relearn the fundamentals. We need to keep our drawing simple enough that we can clearly see what is going on. At a glance, we should be able to know what going on in our drawings.
Figure out what is most important in your gesture drawing and focus on that. Let everything else fall to the wayside. If it is not important, it should only get lip service at best. Think about it this way; if you are creating an ad for a cleaning spray then that would be the focus, not the hair or eyes of the subject holding the bottle.
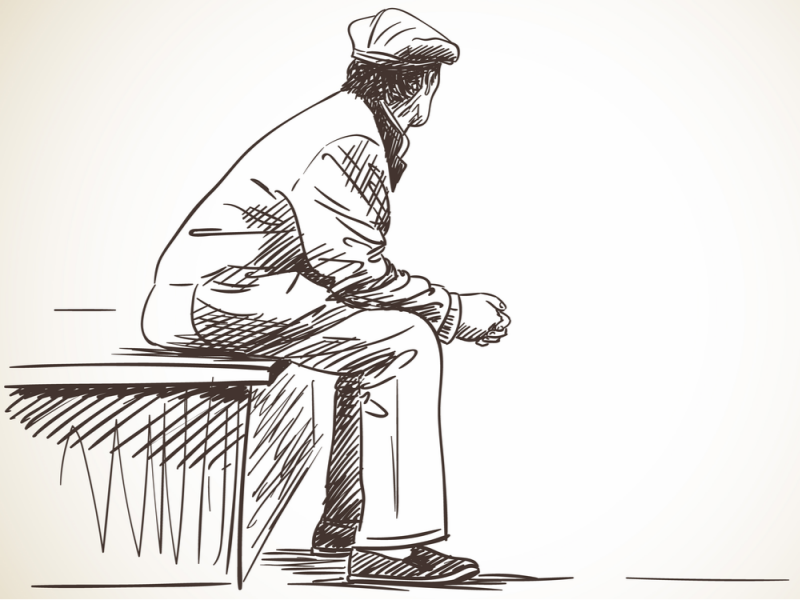
See the world around you. Head to a park and pop a squat on a bench and sketch people as they pass by. This will force you to get the essence quickly. Head to a library (do people still go to the library) and draw people as they are reading or studying. Get out of the house. Look at your surroundings and start to sketch.
If you have a touch of agoraphobia or you don’t want to leave the comfort of your couch, then there are some pretty great sites out there for you. The sites listed below are free to use.
Sketch Daily is one of my favorites. I love how easy it is to use. It might not look “up to date” as far as typical websites go, but it works and doesn’t require much more than this.

Quick Poses is another great site that might look older. There are so many options for dynamic poses that it will make your head spin.

On either one of these sites, set the timer and have some fun.
Sidenote: I found that if you are drawing nudes, the poses on Sketch Daily are less erotic and more natural, just without clothes. This will give you a better understanding of the human figure without over-sexualizing your subject.

Get plenty of practice in and then come back when we tackle part 8 of the 9 part series. We are going to be discussing design. This is a fun one because there is a lot to go over and we get to really let loose. Personally, I can’t wait.
While you are practicing, show off your work in the Marketplace. Create a “Living Art Journal” and add your sketches as you go. Personally, I can’t wait to see what you do next. Comment with a link to your living journal and I will check it out.

