
by Matthew Russell - Posted 3 years ago
Welcome, CryptoComics Compatriots/Fellow Artists, back to the exciting world of comic-style drawing! Get ready to unleash your creativity and bring your characters to life with bold, expressive mouths that speak volumes. Today, we're diving into the art of drawing a comic-style mouth, where every line and curve can convey a wide range of emotions, from laughter to rage and everything in between.
But before we embark on this thrilling journey, let's take a quick detour down memory lane. Remember that awesome blog post on "How To Draw a Face"? (OK, I think it’s awesome because I wrote it.) If you're unfamiliar, no worries! It's a fantastic resource that covers the fundamentals of capturing the essence of a character's visage.
We highly recommend checking it out to ensure our comic-style mouth perfectly complements the overall expression of your drawings. It's like having a superpower to communicate emotions visually!
Now, back to our mission: the mouth! Are you ready to unleash your artistic prowess? Great! Grab your trusty pencil, and your favorite sketchpad, and let's get those creative juices flowing. We'll start with the basic shape of the mouth, giving it a dynamic and lively appearance that will captivate your audience.
Remember, comic-style mouths can vary greatly depending on the character's personality and the emotions they're experiencing. Are they mischievous troublemakers? A superhero ready to save the day? Or a lovable goofball? Whatever the case, we'll explore various styles and techniques to create those iconic smiles, smirks, and even the menacing grins that send shivers down our spines.
So buckle up, artists, because we're about to embark on a thrilling adventure through the realm of comic-style mouths. Get ready to add that extra dash of personality and charisma to your characters! Together, we'll master the art of drawing expressive mouths and continue building upon the solid foundation we established in that awesome blog post about drawing faces and the eye tutorial. Let your creativity soar, and let your characters speak volumes with just a smile.
Now, grab that pencil, channel your artistic energy, and let's dive into the wonderful world of comic-style mouths! Get ready to have some serious fun and bring your characters to life like never before. Let the adventure begin!

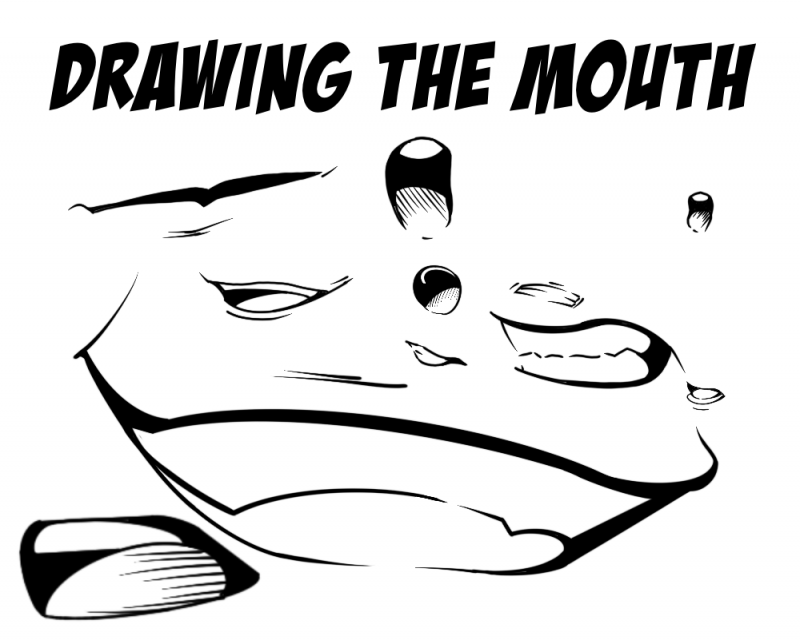
Unleash your artistic powers with straight-on, flat drawings as we explore the intricate structures of the mouth—from bones to muscles and fabulous fat pads. Get ready to dissect mouth secrets, creating vibrant expressions like never before!
Get ready for a wild ride as we explore the dynamic interplay between facial muscles and skeletal structures in our drawings! The muscles sit over the bones, adding energy and life to our characters' expressions. From the cheek muscles that create infectious smiles to the puckering orbicularis oris and the versatile frontalis muscle on the forehead, each muscle plays a vital role in conveying emotions.

As you can see from this drawing, we are going to focus on the muscles of the mouth. Since every artist seems to have a drawing of a skull somewhere in their portfolio, I took a sketch that I drew years ago and overlaid it with a new drawing of the muscles. In all fairness, I drew the muscles while waiting in the doctor's office and looking at one of his hearts on the wall.
Did you know that inside our lips, there are five main fat pads that play a crucial role in shaping our smile? These fat pads, also known as labial fat pads, are responsible for the plumpness and fullness of our lips, adding that irresistible charm to our faces. Each fat pad is strategically located within the upper and lower lips, contributing to the overall structure and contour.
They provide support, cushioning, and a natural voluminous appearance that enhances our expressions. So, the next time you draw a comic-style mouth, remember to consider these fantastic fat pads and let them guide you in creating the perfect, dynamic lips for your characters.

When it comes to placing the mouth on a face while drawing, there are a few key steps to keep in mind. First, begin by locating the center of the face, which is typically in line with the eyes. This will serve as a reference point for positioning the mouth accurately.
Next, draw a vertical line downwards from the center of the eyes. This line will help you determine the width and placement of the mouth. The width of the mouth is usually around the same length as the distance between the centers of the eyes.

Now, to position the mouth horizontally, draw a horizontal line starting from the center of the eyes and extending to the sides of the face. The mouth typically falls around the midpoint of this line.
Remember to consider the proportions and individual characteristics of the face you're drawing. Some mouths may be wider or narrower, higher or lower, depending on the person or character you're depicting. Take into account factors like age, gender, and expression to make your mouth placement more realistic and expressive. With practice, you'll gain a better understanding of how to position the mouth in relation to the face, creating beautifully balanced and harmonious drawings.
If you want to get to know full lips, check out the show “The Bachelor”. I know this sounds weird. My wife loves that show and as a married man (happy wife, happy life), I often have to watch it with her and discuss it afterward.
I would often bring along my iPad and sketch while watching. Now, my wife is the type of person that cannot sit still for an hour-long show, so she is constantly pausing it to go do something (go to the bathroom, get a bag of popcorn, a glass of wine, something). I began to sketch the faces that appeared on the tv when it was paused.
The lips of the various females on the show tend to be plums and glossy. This helped show off the structure so much. The problem is when sketching, there are wrinkles that go vertically along both the upper and lower lips but are more pronounced along the bottom.
If you are going for realism, add them and focus on them. In a comic setting, don’t! Let your colorist try their hand at it, but don’t add them to your inking. It will make your lips look far too busy and distract from the rest of the face.
Remember, less is more. Keep everything as simple as possible and just avoid the “worm-lips” as my wife falls them.
No, I am not referring to any type of peace and tranquility, I am looking for the center of the lips.
When it comes to drawing, it's a no-brainer that a center line is your secret weapon. It's like injecting life into your drawings, giving them dimension and depth. Check out the snazzy blue center line I've drawn for the lips!
Now, get this: in the front view, those lips may seem as flat as a pancake, but we know better, don't we? In the three-quarter view, the lips unleash their wild side with a curvy, wavy nature. Just like the mouth's horizontal opening when closed, the center line goes all wavy too, like a rocking wave in the ocean.
The top lip mostly faces downward, often casting a cool shadow if the light comes from above, while the bottom lip does a daring flip and faces upward. It's like an "S" curve that adds a dash of irresistibility to those lips, making them oh-so-attractive. Who knew a wavy line could bring such charm?

Alright, fellow artists, let's dive into the exciting world of lips and their epic mountain/valley relationship! Picture this: the top and bottom lips are like majestic mountain peaks, creating incredible planes that will take your art to new heights. But hold on tight, because we're not done yet! Above those fabulous lips lies a slanted plane that sneaks back toward the nose, eagerly awaiting a spotlight from above.
Meanwhile, the top lip takes a groovy slant downwards, while the bottom lip flips the script and faces skyward. In your average top-lit scene, get ready for some lighting magic: the area above the lips shines, the upper lip rocks a shadow, the bottom lip beams with light, and below the bottom lip embraces its shadowy side. It's like a mountain range adventure: peak, valley, peak, and valley!
We are breaking the planes of the lips into basic shapes made up of various triangles. Here is a study of such lips.

Now that we've nailed the basic shapes, it's time to unleash our creative powers! Grab your trusty pen and prepare for a step-by-step journey as I guide you through the art of drawing those mesmerizing lips. Get ready to rock and roll, because we're about to make your artwork lip-smackingly awesome!
If you are drawing digitally, I would suggest drawing steps 1 & 2 on a separate layer. I like to sketch with blue, green or red for these stages so that I can keep them straight and separate from my drawings.
If you are drawing on paper use a blue color pencil and sketch lightly. Then follow my tutorial on “Removing The Blue Lines In Photoshop” when you are all done.
Yep, we start with a hockey puck or a wedge of cheese, however you want to look at it. This shape contains all the features inside the skeleton and muscular systems.
Alright, fellow artists, let's dive into the mouth-drawing extravaganza, comic-style! Here's the deal: to kick things off, we need a snazzy cylindrical grid. The mouth, my friends, is a round denture sphere, and starting with a cylinder is like giving it a head start with that awesome curvature in mind.
So, draw that cylinder with a funky wedge that takes up about a third of the whole shebang. But here's a pro tip: keep those initial lines light and airy because they're merely guides, paving the way for the final lines that'll make your artwork shine!

This step is purely for reference. It will help you best figure out where and how your lips shape up.
Just like in the thrilling Location and the Center Line section, we're going to rock that peak/valley vibe with a curvy line that screams "awesome"! Trust me, as you spend more time honing your lip-drawing skills, you'll come to appreciate why this step is crucial for nailing those jaw-dropping results.
Oh, and one more thing: remember to keep that line light and breezy, because we're still in the sketching zone, my friends. It's all about laying the groundwork for the epicness that's about to unfold!

Alright, folks, it's time to unleash the real pencil power and dive into the mouth-drawing adventure! Grab that trusty pencil and move on to another layer (assuming you are drawing digitally), because we mean business! Just like in any epic cartoon, focus on drawing that magnificent middle line.
Here's a pro tip: make sure this line lines up perfectly with the valley in the center line from our awesome Step 2. We've also got a special treat for you—a puffy centerpiece of the lip, labeled as #2 in the first diagram.
Now, it may have taken a little detour from our original center line, but hey, art is all about that give and take, my friends. Embrace the creative flow and let your imagination soar as we bring this mouth to life in the most dazzling way possible!

Hold your brushes, artists, because we're about to level up our mouth-drawing game! You see, in the magical world of cartoons and animation, we could totally call it a day at this point—our mouth is looking pretty darn good! But guess what? We're here to embrace the vibe of the modern comic, and that means we're taking it to the next level. Buckle up and get ready to dive into the world of lip delineation!
It all starts with the top part of the upper lip. With just a few expert strokes, we'll add that extra touch of awesomeness.
3 lines should do it. The first is the center top. This is generally an arc that slopes downward. The next is the outsides. Keep in mind that we are drawing a ¾ view so the side that is closer to you will be considerably longer.
Keep these lines light and flowy. Noting should be a straight line here.
Picture it: those lines coming to life, defining the shape and character of the lip like a true pro.
So, grab your pencil with confidence and let your artistic magic flow. It's time to bring those lips to the forefront, giving them the attention they truly deserve. Get ready for an epic lip-delineation adventure that will make your artwork shine in the world of modern comics!

Boom! We're on a roll, my fellow artists! Take a step back and admire your masterpiece—it's starting to look like a mouth that means business! But hold your pencils tight, because we're not done just yet. It's time to add that marvelous bottom lip into the mix, and here's where the real fun begins!
Remember that awesome structural diagram we glanced at earlier? Well, it's time to put that knowledge to work. Brace yourselves for the split lower lip, divided into two fabulous parts. Now, watch closely as I show you a pro move: overlapping those strokes for the bottom lip.
That's right, my friends, by skillfully intertwining those lines, we're indicating those two distinct forms, like superheroes joining forces! It's all about creating depth and dimension, making that lower lip pop and demand attention.
So, grab your pencils with enthusiasm and let's conquer this final lip-drawing frontier. With each stroke, bring those two parts together in harmony, showcasing the unique beauty of the lower lip. Get ready to witness your artwork come alive, transforming into a mouth that's ready to captivate and inspire. Let's rock this, artists!

DON’T FORGET TO SWITCH LAYERS NOW!!
Hold onto your art supplies, because we're about to give our drawing that final touch of epicness! It's time to add some shadow and line weight that will make our masterpiece shine like never before. Picture this: the light is streaming from above, so we're going to rock those shadows underneath the lips and in the corners of the mouth. That's where the magic happens, my friends!

Experiment with line weight to add visual interest and dynamics to your inking. Thicken certain lines, such as the outer edges or shadow areas, to create depth and emphasis. Use thinner lines for delicate details or areas that require subtlety.
Review your inking work and make any necessary adjustments or touch-ups. Erase any stray pencil marks and clean up any smudges. Take a step back and admire your masterpiece!
Remember, practice makes perfect. Don't be afraid to experiment, explore different styles, and develop your own unique approach to inking comic-style lips. With time and dedication, you'll become a master of this captivating art form. So, grab those pens and let your creativity soar as you bring your characters' lips to life with your inking prowess!
To truly elevate our artwork, we can't forget the power of hatching. It's all about creating that smooth transition from shadow to light, adding depth and dimension to our piece. With confident strokes and a dash of artistic finesse, we'll hatch away, indicating the magical gradation that brings our drawing to life.
So, grab your trusty pencils and dive into this final step with gusto! Embrace the shadows, play with line weight, and let your creativity soar. It's time to make your artwork shine with the perfect balance of light and dark. Get ready to impress the art world with your jaw-dropping skills!

And there you have it, fellow artists! You've conquered the world of inking comic-style lips with style and flair. Give yourselves a round of applause for your amazing talent and dedication. But hey, don't put those pens away just yet, because we're not done unleashing our artistic superpowers!
Next up on our artistic adventure, we're diving headfirst into the captivating realm of drawing comic-style ears. Get ready to tackle the intricate details and unique shapes that make each ear a work of art in its own right. We'll delve into the curves, lines, and shadows that bring ears to life on the page.
So, mark your calendars and set your artistic alarms, because we're not stopping here! Join us next time as we embark on a thrilling journey into the world of comic-style ears. Stay tuned, keep those pencils sharpened, and get ready to level up your artistry like never before. Trust me, you won't want to miss it! See you soon, fellow creatives!

